Rabu, 12 Oktober 2011

Building A Memory - Schreiber-Bogen's "Pfalz im Rhein bei Kaub" Pt 2


I didn't spend a whole lot of time this week on the model, but did manage to get the roofs and towers around the wall perimeter finished. This was a fairly straight forward task. It starts by gluing in place a small tower, followed by a long roof, then another tower and so on. Total time now spent on the model: about 14+ hours. Here's a couple of progress photos and some tips. Enjoy!


Getting the roofs to hunker down into a good fit is covered below.


 I used a black felt-tip marker cover the exposed edges of all the roof sections as well as some other areas around the structure.


Label: , , ,

Building A Memory - Schreiber-Bogen's "Pfalz im Rhein bei Kaub" Pt 3


The "Pfalz im Rhein bei Kaub" castle is nearly finished. This past week I worked on the central tower. It went almost without a hitch EXCEPT for the very top roof section. It's a little piece with eight sides that, when glued together, is supposed to have a somewhat rounded shape. That little booger gave me fits!!! It was probably a combination of unsteady fingers, poor eyesight, old age, the stars weren't aligned right - something. Prior to gluing, each of the sections were rounded/bent by rolling them over a small round object (I used my wife's crochet hook). That SHOULD have made it easier to glue-up but it was simply difficult for me holding two roof sections together in an arc waiting for the glue to set up so that I could get on to the next section. Tweezers helped somewhat but they're made for straight objects and didn't work very well on the small curved forms. Anyway, it finally went together and here's a couple of photos to show this week's progress. Enjoy!


Label: , , ,

Minggu, 09 Oktober 2011

Building A Memory - Schreiber-Bogen's "Pfalz im Rhein bei Kaub" Pt 4

Well folks, the past several weeks has been interesting. I didn't know what I was about to get into when starting this project but it's finally finished. It's the most difficult paper model I've ever attempted, never having done more than simple four-walls-and-a-roof buildings. The project to-date has taken approx. 18 hours and the past few hours have really been a bear! The very last parts to assemble were 22 small dormers located around the perimeter of the structure and these were quite tricky for me as they were pretty small and required a little more agility than I have left at my age. To make matters worse I inadvertently sliced through a couple of what were supposed to be fold lines! Oh crud. Still, after a little repair work, everything finally went together and here are the photos of the finished castle. It measures 8 1/4" (20.3cm) L x 3 1/8" (7.9cm) W x 5 3/4" (14.6cm) H. Stay tuned because the next step is trying to put together a small diorama to display the model on. Enjoy!


Label: , , ,

Kamis, 06 Oktober 2011

Building A Memory - Schreiber-Bogen's "Pfalz im Rhein bei Kaub" Pt 5

Progress on the "Pfalz bei Kaub" diorama has been slow going - mostly because I've been too pooped after work to mess with it! However, that being said, I did manage to get something done this week. I found a piece of MDF (medium density fiberboard) shelving laying about - I should have tossed it out a long time ago, now I'm glad I didn't - and it was pretty much right for what I wanted to accomplish.

This castle actually sits in the middle of a river on a rock. Some photos on the Web show the river exposing the rock and some show the rock nearly covered. I figured there were two basic ways to approach this diorama:
1.  Make a small base with just a hint of the rock showing and suggesting the water lapping up to the castle sides.
2. Model the exposed rock - along with the trees which had been planted on one end. This of course would require a larger diorama base.

The shelf piece I had found measures 11.25" (28.6cm) W x 28" (71.1cm) L and after looking at it, it appeared to be nicely suited for the larger diorama showing the exposed rock. Had it been shorter I probably would have cut it down even more and just gone with option 1.

  I printed photos of the castle  culled from the Web and used those to draw a rough outline of the rock on brown craft paper. It won't be exact, but I think it'll look OK when finished.


The pattern drawn on the paper was cut out and used as a template to cut pieces of .5" (1.3cm) thick Styrofoam. The Styrofoam was then glued to the shelf piece.


Hopefully we'll be able to get a little terraforming accomplished by next week. Until then - Enjoy!

Label: , , ,

Building A Memory - Schreiber-Bogen's "Pfalz im Rhein bei Kaub" Pt 6

It's nice to report that there's been some progress on the  Schreiber-Bogen "Pfalz im Rhein bei Kaub" diorama this week. Perhaps not a great deal but progress is progress after all. I'll detail the particulars below.Enjoy!

Taking a rather large box cutter with the blade extended, the Styrofoam was slowly whittled down to a  contour I was satisfied with. I use this material for many of my projects and am used to it but oh brother is it messy! However, I've formed a workable routine: carve, pick up loose chunks & toss in garbage, vacuum. Repeat: carve, toss, vacuum


Next, the foam gets a cover of ready mixed, light-weight, patching plaster. It doesn't really hold detail well and would generally not be suitable for exacting scale work. It has a decent working time - about 15 minutes, and because it doesn't dry rock-hard like plaster, one can just poke in trees, shrubs, poles, whatever. Wait until it sets-up enough before painting - about 30-45 minutes. 


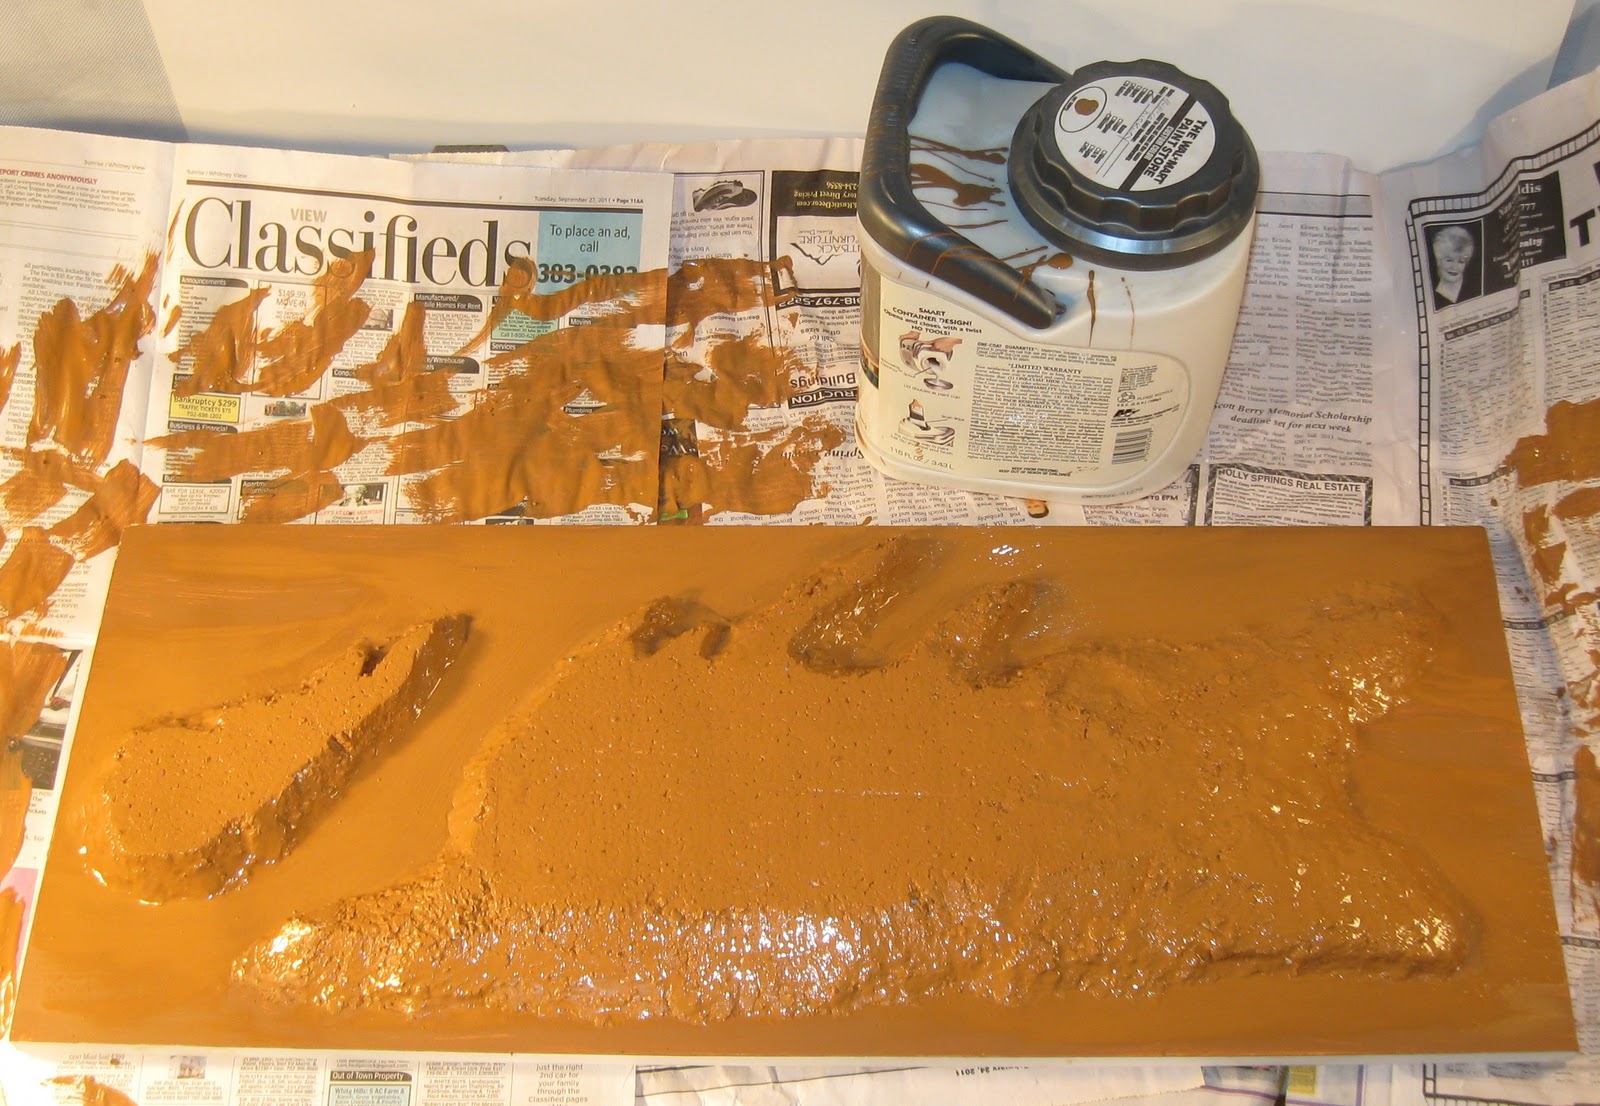
Now everything gets a coat of paint. This will be the base color upon which lighter colors will be layered. Normally I use a dark brown, but felt that this hickory shade will be just fine for what I want to do. With Styrofoam it's important that one uses latex paint - NOT oil , lacquer, or spray paints. They will eat away the Styrofoam like acid. Oh, and by the way - do protect your work surface. This is not a mess you can vacuum!!

 The dioramas featured here on Toys & Stuff are simple by choice. I'm no Master Modeler and know that I'll never make it into the Modelers Hall of Fame. But I'm willing to bet most of you readers are in the same boat I am. Just average modelers who want to work on their hobbies without over critical reviews. In other words, we're in it to have fun!

Label: , , ,